
Empfehlung: Start with a mid-range handheld scanner and a clean workspace with stable lighting. Place calibration markers on a turntable and capture from multiple angles (6–8 views) to ensure completed coverage; this approach does deliver quality data suitable for most projects and reduces post-process effort.
After capture, a compact workflow turns collected data into a coherent model. Here, align scans, filter non-essential points, and merge into a single mesh; this completed process relies on anchor points and markers. Use a measurement reference to compare key features and measure deviations from the nominal CAD.
In the field, surface condition matters: for aircraft components, apply a matte coating to minimize reflections; then capture in sections for large assemblies. This approach handles large objects more reliably than single-shot attempts, and it highlights significant details across features.
Quality control in practice: compare the gathered data with the CAD model by measuring deviations; a significant discrepancy (>0.5 mm on a small feature) indicates a need to re-capture; use a set of stable reference markers and ensure the collected dataset aligns with the design intent. The year of hardware and software updates can influence expected accuracy.
Practical tips to optimize the workflow: keep data organized in a clear workspace, tag sets with project names, and document the angles, scale references, and markers used. Limit non-essential steps that do not improve results; for fast turnaround, reduce resolution where possible while preserving measurement fidelity. Here, you’ll finish with a dataset that is ready for processing and sharing.
Choosing the right scanning method for your object: laser, structured light, or photogrammetry
For textured subjects photogrammetry provides a portable, cost-efficient path. Capture overlapping photos around the object with uniform lighting. The workflow yields a product model with realistic texture, suitable for life-size sizes and large projects. Processing uses software to align frames, build a dense point cloud, and produce a textured mesh. Standard cameras and lenses enable a flexible setup across year cycles. The approach brings broad accessibility to non-specialists while delivering data for design, analysis, or archive tasks.
Laser-based measurements
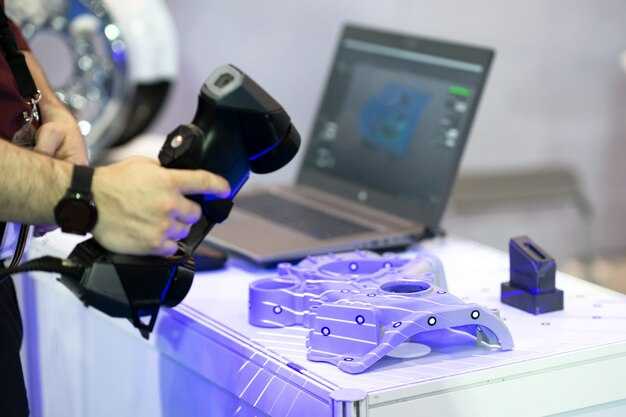
Laser line and point systems deliver dense geometry on hard surfaces with minimal setup. Use a calibrated device, capture passes from multiple angles, and compile frames in specialized tools to generate a metric mesh. Tracking across passes improves alignment and traceability, strengthening the workflow. On-site work remains portable, enabling quick feedback and a steady workflow. The result supports reverse-engineering, measurement, and digital asset creation for large objects.
Structured-light capture
Structured-light projects coded patterns onto surfaces; a camera and projector triangulate depth. Small to medium items gain speed; lighting must stay consistent to avoid shadows. This method yields colored textures and dense geometry, feeding a unified workflow across tools and programs. Portable setups enable on-site capture, delivering rapid data and enabling integration with other data streams across life projects. Live updates help teams track changes through a project life.
What happens during a capture: setup, motion control, and exposure considerations
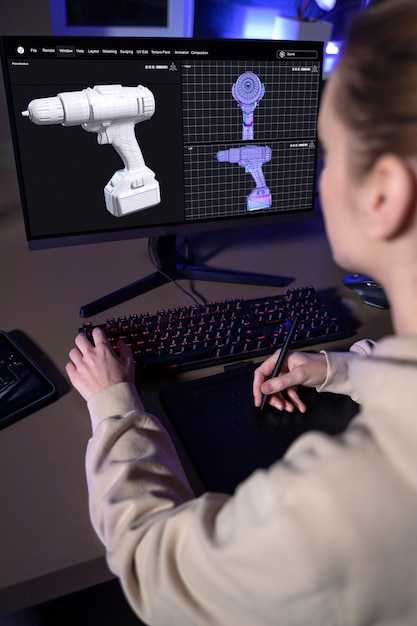
Secure the scanner on a rigid, vibration-free platform and enable motion control profiles before capture to ensure repeatable geometry.
In the browser-based control page, select the recommended capture profile and enable the data-collection tools; this, therefore, keeps exposures consistent and reduces drift.
- Prepare the workspace: clear the area, set up a matte backdrop, and apply fiducials if patterns are needed for alignment. Clean surfaces to improve noticing of features and ensure surfaces are ready for detail capture.
- Position and distance: mount the scanner so the optic axis targets the center of interest; maintain the right distance and angle to cover each surface without gaps; verify overlap between successive passes; you should be able to capture every visible pattern.
- Consent and contact: confirm consent for capturing the object, space, or people; minimize contact with individuals and fragile items; clearly communicate how data will be used and stored for page context, marketing, or product development.
- Lighting baseline: use diffuse lighting, avoid direct reflections; check white balance and exposure to prevent blown highlights on bright surfaces; capture a quick calibration frame to verify exposure.
- Test sweep: run a short pass to verify coverage patterns and ensure rich detail on key surfaces; adjust exposure, lighting, or motion profile if required.
Motion control considerations
- Use motorized or programmable motion when possible; they would rely on repeatable paths to compare results across campaigns; avoid sudden changes in velocity that create gaps in the point cloud, which engineers rely on for product function analysis.
- Set acceleration and deceleration limits to match the object’s size and shape; this keeps data crisp and reduces motion blur on right-facing surfaces.
- Synchronize equipment and ensure the page status shows enabled sensors and a stable framing; this is critical for repeatable sequences and for data users such as marketing teams to assess impact.
Exposure considerations and surface handling
- Lighting balance: diffuse the light to reduce hotspots on metal, glass, and polished plastics; when surfaces are highly reflective, use cross-polarized lighting or calm reflections to improve data quality.
- Exposure targets: set a baseline exposure that captures texture without clipping highlights; capture additional frames at slightly different exposures if the object features a wide dynamic range.
- Surface treatment: avoid altering the object; for challenging surfaces, consider masking or temporary matte coatings where permitted, and always obtain consent from stakeholders before applying coatings.
- Workflow guidelines: maintain a clear page with metadata, including user notes, environmental conditions, and session IDs; this platform-centered data helps users and engineers refine the product function and marketing messaging.
Processing pipeline: alignment, meshing, and texture mapping explained
Recommendation: use a two-pass alignment workflow: start with a coarse global alignment using reliable landmarks and then apply a local ICP refinement to lock down geometry. This produces higher accuracy and high-quality results that designers can trust in any workspace.
Alignment is described through categories: feature-based, cloud-to-cloud, and global best-fit. For edge-rich objects, edge-based features accelerate convergence. After each pass, evaluate quality with metrics such as RMSE, point-to-plane distance, and coverage, and ensure scale and orientation are consistent across datasets. The result should preserve sharp boundaries and minimize drift through the entire point cloud.
Meshing follows alignment: generate a triangulated surface that respects the geometry. Define a target edge length aligned to object size; for a small object such as a figurine, 0.5–2 mm is reasonable; for furniture or rooms, 3–8 mm works better. Use a stable sampling strategy and preserve high-curvature details by adjusting edge preservation and normal orientation. After meshing, apply smoothing and a controlled decimation pass to reach a high-quality balance between detail and performance. Maintain manifold topology to avoid holes or non-manifold edges and review edge flow where seams appear.
Texture mapping connects color information to the mesh. Unwrap UVs with minimal distortion, align color data from multiple captures, and manage color space consistently. Bake textures from aligned views to reduce shading differences and create coherent maps at 4K–8K resolution for near-field captures; for large scenes, consider tiled textures. When the texture is made, verify seams, fill gaps, and ensure consistent edge color across patches. If licensing rights govern textures, record and manage those rights alongside the asset page for traceability.
Quality checks occur after each step: evaluate alignment accuracy, check for holes and non-manifold edges, and confirm texture alignment along borders. Run automated checks for overlap, rim artifacts, and normal consistency; perform a quick visual review on portable workstations to ensure every detail is clean before export. Document results and any change ideas to feed the next iteration and keep the process predictable for designers and clients.
Workspace and process details: maintain a modern setup with calibrated lighting and a stable workspace, a reliable computer, and sufficient storage. Use portable scanners when needed and organize data into categories by object type, size, and finish. Keep a page of export presets and metadata to support rights management and collaboration. The workflow should be able to reproduce the same output across projects, making it easier to scale from personal projects to teams and studios. The information generated by each stage informs design decisions and reduces unnecessary change later in the design cycle.
Implementation steps you can apply now: 1) create a fixed reference model and define a common coordinate system; 2) perform a coarse alignment followed by an ICP refinement; 3) generate a clean, manifold mesh with a reasonable edge length; 4) unwrap UVs and bake textures with consistent color management; 5) export formats that preserve geometry, textures, and metadata, including licensing rights. This process helps designers stay productive and ensures that results remain portable across tools and platforms.
Data quality factors: resolution, noise, and accuracy trade-offs you should know
Set target resolution by object size: for tiny objects 0.25–0.5 mm; for mid-size items 0.6–1.5 mm; for large surfaces 2–3 mm. This preserves edge fidelity and keeps data volumes manageable on a single workspace device and in a browser. In every capture, lock the coordinate system so data maps onto a common frame across visits.
Control noise with lighting and texture: diffuse lighting from multiple angles reduces glare; avoid sharp shadows and moving lighting; keep the object stationary during the capture cycle. For glossy or translucent surfaces, expect higher noise; apply matte spray or masking removed after processing to lower glare.
Ensure sufficient coverage by scanning from at least three orthogonal directions and around the edge; add one or two extra passes with slightly different angles; watch data volume as you increase density; higher density increases detail but may degrade performance on older devices.
Calibration and reference frames: include a known target in each set of captures; align scans onto that reference plane; a practical accuracy target is under 0.5 mm for mid-size parts and under 0.2 mm for small objects.
Texture and material influence: flat, featureless surfaces hinder alignment; curved forms provide stable geometry with enough overlap; textures help but extreme patterns can confuse algorithms. For life-sized models, lasers add depth accuracy and robust geometry when lighting is consistent.
Workflow discipline: define a campaign per room or place, listing objects, needs, and owners (designers, users); collect metadata such as scale, object name, and surface type; keep workflow documentation in the workspace and ensure devices export data for colleagues to review in a browser.
Quality checks and decision points: compute point-to-surface deviation in overlaps; if mean error exceeds thresholds, re-capture the affected region and merge again; remove outliers before final mesh generation.
Common pitfalls and tips: ambient lighting shifts between visits distort color and geometry; avoid moving objects during capture; cover reflective surfaces; plan to visit the site during stable lighting windows; large campaigns may require staging areas and additional devices such as scanners or lasers.
Impact on outcomes: data quality affects fit, assembly, and virtual visualization; designers rely on precise geometry to map onto assemblies; users reviewing results expect consistent scale across surfaces and objects. Remember that data quality is a balance between speed, accuracy, and file size; decimate meshes after alignment when necessary to maintain interactive performance in a browser and keep information organized for future campaigns and work sessions.
Common artifacts and practical fixes: reflections, translucency, and occlusions
Apply a matte spray to reflective surfaces or diffuse lighting, and fit a camera with a polarizing filter to cut glare; this makes captures cleaner for each object’s geometry and sets a solid baseline for beginners and designers alike. If you notice an issue where highlights hide edges, adjust light angles to about 45 degrees and add a second diffuse panel on the opposite side; this helps the eyes perceive true contours and reduces noisy clicks in the review stage. When an object’s appearance still disrupts the language of the mesh, reserve a separate set of shots specifically to cover glossy zones, and delete the problematic captures before proceeding to the completed alignment.
Plan captures around the object with substantial coverage: aim for 60–70% overlap, 12–24 angles around the circumference, and 4–8 shots from the top and bottom if possible. Use a turntable to build consistency, access a controlled background, and keep a steady distance so each frame contains enough geometry to support a reliable case for alignment. If a surface is translucent, be prepared for internal scattering; in such case, run multi-pass scans from different lighting directions and color-calibrate after the merge. Completed projects often benefit from re-checking the set and re-capturing any zones that show gaps, which prevents holes from appearing once the mesh is built and textures onto the model.
Reflections and lighting tweaks
Use cross-polarization when possible: place a polarizer on the camera and a light-diffuser combo to minimize specular hotspots. Position key lights at 45 degrees to the surface and keep ambient light low; this is how designers keep geometry readable and avoid sample-to-sample variability that users at the campaign stage notice. A small white panel can act as a soft reflector to fill shadows without creating new glare. For translucent objects, backlighting with controlled diffusion often yields cleaner edges; if you still see glare, temporarily mask glossy areas with a reserved matte spray and re-shoot only the affected angles. After re-captures, review the results in the viewer and verify that every edge is solid; noticing gaps means you should click through the dataset again and possibly re-capture from the missing viewpoints.
Translucency and occlusion remedies
Translucent materials benefit from two passes: a surface-focused pass to lock down visible geometry, and a separate interior scan to study light transport. Backlighting and cross-polarized lighting reduce internal reflections, helping you access hidden features where occlusions occur. If parts of the model remain occluded, rotate the object onto new axes or temporarily reposition accessories to clear the line of sight; in some cases, you must rebuild occluded areas later with hole-filling tools after the merge. When the first pass leaves holes, run a second campaign with closer shots along the problematic regions and then merge captures to create a more complete mesh. Always back up the data and label cases so designers can reuse the same approach in future projects; after processing, review comments from teammates, as they often help improve alignment for the next set of captures and campaigns.


 How 3D Scanning Works – A Beginner’s Guide" >
