


 How to 3D Scan an Object – A Step-by-Step Guide to High-Quality 3D Scans" >

Start with a stable setup: fixed tripod, even lighting, and a well-calibrated capture rig. Usually, the engineer-led workflow begins with selecting gear that balances precision and speed, and once calibration is verified, you can begin capturing from multiple angles to ensure full coverage.
To collect data that will export cleanly into design software, aim for consistent overlaps. Between consecutive frames you should see 60–80% overlap for small items and 40–60% for larger artifacts; this data is repeatedly captured, making the dataset cohesive for processing. Use a pattern that keeps the subject centered while you move around it, and avoid shadowing thin edges that may fail to register in the model.
In the processing stage, align and merge frames to produce a watertight mesh. When choosing software, look for features like robust alignment, texture mapping, and reliable hole filling; the result should be suitable for printing and for further design work.
Preserve essential details and human-scale features that convey texture and form. Pay attention to delicate or thin areas–edges, spokes, or filigree–that are prone to data loss. The approach involves capturing how light interacts with shapes and materials, so you can reproduce surface shading and fill gaps in a faithful way. This is especially important for heritage pieces, where context and accuracy matter for future generations.
With a clean mesh, you can export into formats used by your printer and by design teams across projects. For heritage items, document the workflow and maintain a record of camera angles, calibration data, and any post-processing steps; this makes it easier to reproduce results in future projects and to share a replicable method between teams. These works can be directly fed into fabrication pipelines and into restoration or museology projects.
How to 3D Scan an Object for Manufacturing: A Practical, Actionable Plan
Begin with a focused pilot on a mid-size automotive bracket to prove a repeatable digitization workflow that delivers accuracy within ±0.2 mm and a clean mesh in a production cycle. Create a reference library of items with different geometries to build the industry’s ability to reuse them, enabling more efficient large-scale projects.
- Define objectives and metrics
Clarify what will be obtained from the digitization, including CAD-ready surfaces, inspection meshes, and cross-sectional data. Set length, width, and feature tolerances aligned to standard manufacturing needs. Establish acceptance criteria and a main metric (e.g., RMS deviation) to know when results fit the required use, and document the checks for future audits.
- Choose technology mix
Adopt a fast, interactive hybrid approach: structured-light or laser for geometric fidelity, photogrammetry for texture and color, and a lightweight open-source or paid solution for workflow flexibility. For large-scale items, plan multi-position capture and register them into a single dataset; ensure outputs fit internal standards and downstream software, both free and commercial, when appropriate.
- Prepare the target and environment
Remove powder residues and reflective coatings; apply a matte spray or spray powder to minimize glare on shiny surfaces. Mount the part on stable fixtures to prevent movement, and use non-reflective coverings where needed. Include a calibration artifact to verify length accuracy before every run and document knowable limitations caused by surface texture.
- Plan data acquisition
Define the number of positions, overlap (20–40%), and rotation increments for each section. For long geometries, segment the part into pieces that fit the scanner’s field of view, minimizing occlusions. Capture under uniform lighting with minimal ambient vibration; record scanologys for provenance and traceability.
- Registration and alignment
Run automatic alignment with a robust solver, then verify against key edges. Use both natural features and fiducial markers if necessary to avoid conflicts in overlaps. Check scale against a gauge block and adjust if drift appears; align all segments to a common coordinate system to maintain consistency across the entire model.
- Processing, quality control, and cleaning
Repair holes, remove noise, and apply controlled decimation to preserve critical lengths and features. Inspect for non-manifold edges and open volumes; compare the mesh against the CAD reference to quantify deviations and identify zones that require re-scan. Ensure the obtained mesh maintains watertight status for downstream tooling and simulation.
- Output, storage, and reuse
Export in standard formats such as STL, OBJ, PLY, and 3MF to support manufacturing workflows. Attach metadata: equipment, operator, date, resolution, scale, and tolerances. Use open file structures where possible to enable digitization across teams; implement versioning and centralized storage to support large-scale programs and open collaboration.
Additional considerations cover difficult geometries, including sharp edges, undercuts, and reflective or translucent areas where conflicts between capture methods arise. For every session, create dedicated scan histories (scanologys) to track changes, verify what has been created, and ensure consistency across iterations. In practice, a well-designed plan reduces rework and accelerates digitization for automotive and other industry segments, enabling human teams to deliver faster, more reliable digital twins that fit standard industrial workflows.
Define target accuracy and scan resolution for the part
Set target accuracy at ±0.03–0.05 mm for small, feature-dense sections; ±0.1–0.2 mm for larger bodies. Use data-capture resolution with voxel sizes of 0.05–0.1 mm for most detail, and 0.2–0.5 mm for faster passes when time is tight. This approach leaves edge fidelity within tolerance and minimizes post-editing time.
Choose the approach based on the main downstream use: for digital editing, reverse engineering, or virtual assemblies, keep tighter tolerance in critical zones; for prints, ensure the mesh supports standard wall thickness and reliable assembly. For desktop systems, employ a two-pass strategy: a coarse pass with 0.2–0.5 mm voxel to cover the full geometry, then a fine pass with 0.05–0.1 mm voxel on holes, threads, and sharp corners to protect feature detail. Such a plan balances time and accuracy, and the resulting dataset supports solid results for such workflows.
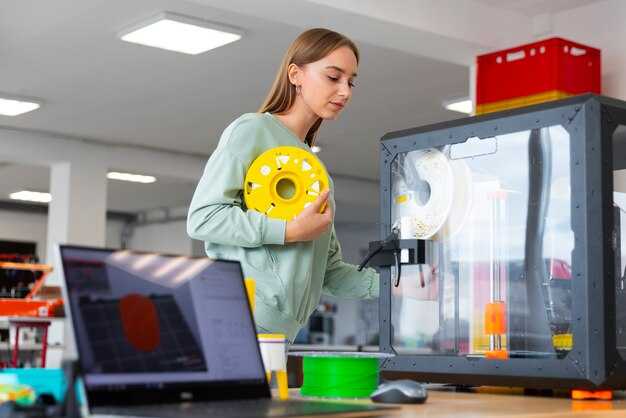
Surface prep and handling: clean the part with isopropyl alcohol; apply powder or a temporary diffuse coating to reduce reflections on glossy metals or plastics. Hold the piece securely with non-marring fixtures. Arrange viewpoints around the part, typically 8–16 angles plus top and bottom, with 60–70% overlap between capturing passes. Maintain a stable distance from the sensor and keep lighting even to avoid shadows that corrupt edge definition. These steps prevent data loss and facilitate reliable editing later, whether you’re pursuing virtual inspections or physical prints.
Editing and export: after capturing, align data to a reference CAD model or a sample physical replica. Use editing to fill holes, remove noise, and tighten the mesh, ensuring the final solid model meets minimum wall thickness and flatness requirements. Export to STL/OBJ/PLY for prints or CAD import, and retain multiple exported versions to share with engineers and teammates. This approach provides a clean foundation for collaboration, whether you’re solving fitting problems or creating replacement parts for a digital-physical workflow.
Validation and insights: run a deviation check against the reference, using RMS and maximum deviation metrics. Color deviation maps reveal whether most features meet the tolerance targets. If deviations exceed targets, add viewpoints, re-clean surfaces, or perform an additional capturing pass on affected areas. When the dataset passes validation, the digital model can be used for virtual inspections, testing, or prints, and the resulting insights can be shared with the team to inform future solutions. This workflow supports such outcomes as samples for testing, virtual comparisons, and practical production, providing engineers with a reliable, exportable dataset and a path to repeatable quality.
Allocate budget and select scanning technology: structured light, laser, or photogrammetry
Recommendation: Opt for a structured-light setup to cover the majority of use cases, because it delivers speed and precision within a sensible budget, while keeping avenues open for photogrammetry when texture or scale demands it. This choice reduces risk and accelerates the work cycle.
Budget framework: allocate the maximum portion to hardware that matches your intended throughput, reserve software and processing budgets, and set aside training. If you intend to prioritize cost, photogrammetry can run with free software and consumer cameras, but processing time and skill requirements rise, so plan for longer durations and more computer resources.
Structured-light scanners offer fast capture and high precision for a wide range of surfaces. Typical entry-to-mid systems generate 0.05-0.2 mm accuracy and handle frame-by-frame retrieval at dozens of frames per second, generating dense surfaces quickly. These devices work best under controlled lighting and require minimal post-processing to produce surfacing-ready meshes. For alignment and noise reduction, the workflow uses slicing and explicit surfaces reconciliation. In addition, the ability to operate repeatedly across products improves reliability of insights.
Laser solutions excel where large objects or special surfaces demand robust performance. They provide high accuracy, long-range reach, and consistent results even on reflective or dark materials after pre-treatment. Upfront costs are higher and speed can be slower than structured light, but maximum gauge on industrial parts is unmatched in some workflows. For accelerations, a frame-mounted or tripod-based system can cover large volumes with minimal setup; this approach reduces errors and boosts confidence in the results for industries such as automotive, aerospace, and tooling.
Photogrammetry leverages photographs to recreate 3D data; hardware costs are minimal, and free software options exist to start, if lighting is controlled and textures are present. The method generates accurate surfaces at large scales, but requires many frames and careful overlap. A typical trial with 50-200 photos yields textured models, though precision can vary by texture and camera calibration. Processing takes longer and can require stacking computer resources, but it remains a fast path for heritage, architecture, and product visualization. When animating or surfacing large objects, plan for data sets that include high-resolution frames to obtain detailed surfaces and textures; the resulting models benefit from post-process surfaces refinement and UV mapping.
Choosing among methods depends on intended outcomes, required tolerances, and industry demands. For rapid prototyping in product design or consumer electronics, a structured-light or laser approach with a frame-based workflow often provides the best speed-to-accuracy ratio. In heritage, architecture, or outdoor contexts, photogrammetry with a good camera and controlled lighting tends to be most economical and scalable. In industries with strict inspection and reverse-engineering workflows, a multi-sensor setup using both laser and structured-light devices can resolve gaps and provide repeated measurements of the same frame to generate consistent surfaces. When available, using Formlabs tools and ecosystem can simplify data integration into CAD and surfacing pipelines, producing reliable loops of data and enabling rapid iteration.
Decision framework: list the intended measurement tolerance, the number of repeatable runs, and the required speed; create a small pilot set to gauge how each method handles the objects. Insights arise from comparing data produced by each technology, and the trial results guide selecting among options. Compare in terms of accuracy, repeatability, and reliability; ensure the processes deliverables align with the downstream surfacing and CAD workflows. The ability to obtain clean, usable data quickly makes structured-light the default, but add photogrammetry or laser for edge cases. Use a trial to validate the approach and avoid over-investing before data is created and evaluated on the target parts.
Prepare the object and environment: lighting, backgrounds, markers, stabilization
Set up a diffuse lighting kit and a single, neutral backdrop to promote physically consistent shape and detail. Use two LED panels positioned at about 45° to the item and an auxiliary fill from above to soften shadows; keep color temperature around 5500K and CRI above 90 for faithful measurements. This approach provides a practical solution for reliable data across trial runs.
Backgrounds and markers: choose a seamless background in neutral gray or white with a matte finish to avoid reflections; place markers around the object so they stay visible from all angles; attach a calibration grid or fiducials to support direct alignment and measurements during reconstruction.
Stabilization: fix the body on a vibration-damped platform or a rigid stand; when rotation is required, use a motorized turntable with calibrated angles and a stop at each position; clamp delicate parts with soft supports to prevent deformation and ensure repeatable orientation; avoid airflow and handling during capture.
Process and customization: define an approach tuned to industries and applications; for simple shapes or sensitive bodies, markers plus texture cues support accurate alignment; a solution can integrate both marker-based and alignment-free workflows, depending on tolerance for measurements and the desired realism; capture is adaptable across processes and applications to resolve scale and orientation.
Quality and outcomes: ensure smooth lighting without hot spots and diffuse reflections on curved surfaces; take multiple angles to cover the body and surface treatments; keep color profiles consistent to support realistic texture and follow-on modeling; this protocol provides better data for product design, customization, and applications, and supports reliable, repeatable outcomes across designs.
Plan capture coverage: angles, overlap, and rotation strategy
Define a complete angular map, set overlap targets, and lock a rotation cadence before you start. This plan raises capture reliability for end-use workflows and enhances preservation of geometry across views.
Angles: target 12–16 yaw positions for small to medium items, expanding to 24–36 for large or curved parts. Use 20–40° steps as baseline; cap changes if occlusion is visible in multiple surfaces.
Overlap: maintain 25–40% frame-to-frame overlap on flat textures; push to 40–60% on gloss, dark, or rough surfaces to ensure volumetric continuity and easier three-dimensional alignment in the software.
Rotation strategy: combine yaw sweeps with two elevations (low and high) to reveal undercuts and edges; for symmetrical pieces rotate in 90° increments and add tilt 0–20° for top faces. If using a turntable, keep constant distance by adjusting height between passes.
Test pass: run a quick check after a subset of positions to verify coverage, detect gaps, and adjust angles or overlaps. This early test goal reduces rework and preserves a smooth workflow, especially when export to engineering or preservation systems is planned.
Preparation and workflow integration: ensure lighting is open and stable, mount fixtures mechanically solid, and verify calibration. Use a plan that is easily repeatable across industries and capabilities; including a documented route using standardized steps makes data capture more reliable and faster to prepare for export in multiple formats.
End-use readiness and data quality: the capture plan must support volumetric rendering, texture preservation, and accurate measurement. After capture, check the data in a test scene to confirm three-dimensional fidelity before moving to processing, alignment, and resurfacing, which raises confidence for downstream preservation and analysis, and enhance data usability.
Post-processing workflow: alignment, noise reduction, hole filling, texture mapping
Begin with precise alignment using ICP against a clean reference mesh, sourced from the same system or a CAD export; target RMSE under 0.2 mm for small features, under 0.5 mm for larger automotive components; ensure overlaps above 15–20% to support reliable digitization and control; what matters is precision, not speed.
Alignment workflow: perform rough alignment using identifiable features and datum points; refine with global ICP or best-fit optimization; apply a reverse pass to verify loop closures; if discrepancies appear, adjust manually to maintain relational coherence between parts and datum; dont skip the control checks; keep a well-documented control file with measurement units and coordinate frames to support engineer reviews and information sharing.
Noise reduction: separate true geometry from exposed sensor noise; apply advanced, non-destructive filters such as statistical outlier removal (SOR) and radius outlier removal (ROR); use edge-preserving smoothing only on areas without sharp features; set thresholds by object size and expected feature accuracy, typically reducing point density by 30–60% while preserving key geometry; validate against the reference information to ensure digitization integrity.
Hole filling: classify holes by diameter and adjacency; fill small holes automatically (<2 mm) with Poisson-based healing or surface diffusion; for larger gaps, patch manually by projecting nearby surfaces and re-meshing with constrained smoothing; after filling, run a local remesh to restore uniform topology and avoid non-manifold edges; in aftermarket automotive projects, ensure fill does not compromise measurement surfaces used for mating parts.
Texture mapping: align color data from calibrated photography to the geometry; perform camera calibration, white balance, and exposure correction; generate UV maps that minimize seams, using a tiled atlas for large parts; texture maps at 2K–4K for typical components, higher for exterior automotive panels with fine grain; keep track of color information in 24‑bit maps and ensure textures are linked to the correct material definitions in the editor; advise checking exposed areas where lighting changes cause color shifts and perform localized corrections.
Data management and exports: store results in a well-structured project, linking geometry, textures, and measurement information relationally; export to OBJ/MTL, FBX, and STEP for downstream workflows; preserve the digitization chain and scanner settings; provenance (einstar); include notes about required accuracy, validation results, and the ability to reuse data anytime for reverse engineering or iterative design; this approach helps engineers in aftermarket contexts and supports control across measurement systems.


