


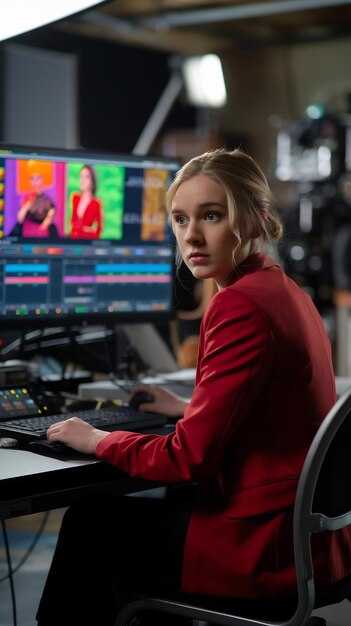
 Video Editor – Which Model Should I Choose? A Practical Buyer’s Guide" >

Start with a modular desktop baseline: 32GB RAM, a fast NVMe SSD of 2TB or more, and a capable GPU (RTX 4070-class) to cover the majority of 4K timelines. This configuration reduces render times, stabilizes uploading, and keeps the workflow fluid across multiple projects. bejan production recommends organizing assets in a root folder and using a simple object model to track cases, with images and imagesvideos stored in separate folders to avoid cross-contamination.
For long 4K projects or multi-user teams, upgrade to 64GB RAM and add a second NVMe drive for assets and proxies. A 2x2TB NVMe setup allows separate OS/app and media caches, improving render speed and export reliability. This design helps both images and motion assets stay in sync, improving the overall workflow and making handoffs smoother for person collaborators.
In practice, define a clear workflow: ingest media, create proxies, edit, color, mix audio, and export. Use tracking to monitor asset status and feedback loops from the team to adjust edits. Build alternative paths for tricky clips and replace assets when needed to stay on schedule across cases. An immersive preview aids early detection of timing mismatches and color drift.
Platform decisions vary by use: field work benefits from a portable setup, studio work from a robust desktop, and bursts can be handled with cloud render nodes. A quick audit from toptal can sharpen your approach, and a feedback channel keeps you aligned with each project. For automation, explore java-based scripts to normalize file naming before import, streamlining uploading and keeping images and imagesvideos consistent for each project.
When weighing between possibilities, focus on design and IO balance: GPU power, memory bandwidth, storage latency, and expansion. Make a list of alternatives with their costs and practical cases, then test with real assets to see how the workflow holds under pressure. If you must choose between configurations, compare long-term costs and upgrade paths to keep the setup melhor with time. For solo work, a single person can manage ingest, proxy creation, and delivery, while teams can split duties across roles for faster turnaround. Replace outdated drives and tighten the asset pipeline so downtime stays minimal and results stay consistent within the bejan production framework.
Which video editor model best fits your workflow?
Go with a modular, cloud-first configuration that scales with your team; higher collaboration yields faster turns, reducing handoff time and time to market while keeping assets centralized for quick reference.
Structure teams by roles: producers sourcing assets and post-production specialists shaping cuts; clear communication prevents bottlenecks and accelerates reviews.
Asset strategy centers on cases and folders, tagging with metadata, and a dedicated uploading lane; include photos as key reference material and maintain a simple search across image sets.
AI-assisted prompts can boost speed: openjourney, piper, gunio, vervoe can draft thumbnails or rough edits; verify that your technical requirements support API access and safe usage.
Culture and training matter: you need consistent onboarding, hands-on training, and peer coaching to raise engagement; youre coordinating across departments, keep lines of communication open; involve their teams in setting standards.
Control and governance: maintain an account-level audit trail; set access controls, version history, and leading practices; align with roles and responsibilities.
Decision frame: selecting a lightweight configuration suits quick pilots; for teams into cross-functional workflows and media variety, define the right balance.
Implementation tips for selecting and refining: run 2-3 cases, gather feedback, measure time, engagement, quality; compare results and adjust the pipeline; keep it concise and focused.
Platform and device compatibility: Windows, macOS, iPadOS, Android, and browser-based options
Pick browser-based access as baseline across devices; no install required, quick onboarding, and direct access to projects and assets. A 30-day trial lets users test readiness, measure latency, and validate compatibility with imagesvideos assets before committing.
For higher fidelity and offline work, lean into Windows or macOS native builds. They deliver smoother scrubbing, faster exports, and better handling of large file sets. Availability and performance depend on hardware and network conditions; plan for 16 GB RAM or more for 4K assets and enable GPU acceleration where possible.
- Web-based workflow (cross-platform) – Runs in modern browsers on Windows, macOS, iPadOS, and Android. Pros: universal access, easy collaboration, direct cloud storage, and straightforward onboarding for teams in asia. Cons: relies on network and may have limited offline features. Best for quick edits, review rounds with viewers, and rapid sharing of projects and assets. Ensure WebGL/WebGPU support and keep cloud folders in sync for consistency.
- Windows and macOS native apps – Desktop installations provide higher performance and offline readiness for large, multi-layer projects. Requirements: 64-bit OS, 8–16 GB RAM minimum (16 GB+ recommended), capable GPU, and 20–40 GB free disk space. Ideal for long sessions, complex timelines, and demanding assets; offshore teams will benefit from a stable, local workflow while maintaining readiness for high-impact deliverables.
- iPadOS version – Touch-first interface with Pencil support; suited for on-site drafts and field edits. Requires iPadOS 15+; battery life matters for extended shoots. External monitor support aids review sessions with viewers; great for on-location work and quick iterations by teams led by people like Anastasia in dynamic environments.
- Android devices – Browser path remains the most reliable option; native Android support varies by region. Suitable for quick mobile corrections and small projects. Plan for memory-constrained devices and use cloud storage to keep assets and projects synchronized; a good fit for on-the-go work and fast turnaround cycles.
- Cross-platform considerations – Maintain a single source of truth for assets and projects. Use consistent naming and cloud-backed folders to balance workflows across teams, including those led by Eugene and Naval in offshore setups. Regular readiness checks across devices help prevent gaps between on-site edits and reviewers’ feedback, and keep viewers engaged during interviews or live streams.
Overall approach: start with browser-based access, then layer in desktop or tablet options when project scale or asset size demands higher reliability. This strategy supports diverse users and minimizes onboarding time for teams across asia and beyond, with a clear path to better collaboration and faster turnaround.
Upload workflow: images and videos–formats, size limits, drag-and-drop, and batch imports
Start with a drag-and-drop intake that limits batches to 200 items, and enforce per-file ceilings: images up to 100 MB and clips up to 4 GB. This setup keeps throughput high while preserving production performance and reduces rework caused by oversized assets.
Supported formats cover image types such as JPEG, PNG, WEBP, and TIFF, along with footage in MP4 (H.264/HEVC) and MOV. For consistency, require sRGB or Rec. 709 color spaces and lock frame rates to 24–60 fps, so frames line up with your edit timeline. This approach helps photographers (photo assets) and cameras from different brands produce predictable results which your software can match across projects and accounts.
Use a batch-import workflow that validates each file on drop, flags unsupported formats, and rejects duplicates. Provide clear feedback: OK, too large, or missing metadata. Batch lists should show counts (image, footage), allows reordering, and supports renaming templates that match your project structure–only assets that meet requirements move to the production queue.
Incorporate neural-assisted tagging to speed up cataloging and search, with auto-generated thumbnails from frames and previews. Offer customization options: presets named after Ashby-style workflows and piper scripts that govern naming, metadata repetition, and category assignment. An alternative path is to rely on simple vector-backed labels for quick adoption, but ensure acceptance tests pass against your core requirements before scaling.
To balance bandwidth and reliability, provide proxies for high-hires assets and maintain original files in a dedicated account or cloud storage. For offshore teams, enable seamless import from remote sources via secure links and mirror folders, with a 30-day revision window to secure adoption and confirm performance. Equip editors with exportable metadata, which helps match footage to the right production line and ensures that both photo and video assets align with overall workflow expectations.
Licensing and pricing: subscription vs perpetual licenses, tiers, and what you get
Start with a subscription to test readiness and engagement; a 30-day trial lets you validate whether the workflow fits, from designs to feedback loops, with figma-like collaboration and minimal upfront risk.
Perpetual licenses deliver long-term cost certainty, but maintenance and updates must be budgeted; use this path if you expect stable, years-long use and prefer fixed pricing over time, often cheaper after year two.
Tiered offerings map to readiness and engagement; the list below shows typical configurations and what you get at each level, including hours of usage, design libraries, and collaboration features.
To evaluate, compare costs against seats and the need for coding or automation; gather feedback from designers and developers, and build cases to show ROI. If you’re wanting to run across multiple projects, look for an option that supports openjourney collaboration and taps into the indexdevs community for best practices.
For источник, reference data from the community can help calibrate expectations; use it to check offerings and real-world cases, ensuring you pick an option that fits your design goals and readiness.
| Tier | Licensing options | Monthly | Annual | Perpetual | What you get | Ideal for |
|---|---|---|---|---|---|---|
| Starter | Subscription; perpetual on request | $9 | $90 | $120 | Core editor, 2 seats, templates, 30-day trial, community access | Small projects, basic workflows, wanting low entry cost |
| Growth | Subscription or perpetual | $29 | $290 | $320 | Advanced libraries, 5 seats, API access, priority support, figma-like integrations | Expanding teams, more collaboration, faster build cycles |
| Pro | Subscription or perpetual | $59 | $590 | $640 | Automation, unlimited projects, 15 seats, dedicated success manager | Design orgs with strong engagement and coding integration |
| Enterprise | Custom licensing (subscription or perpetual) | Custom | Custom | Custom | Full governance, on-prem or cloud, SLA, training, audits, comprehensive support | Large teams with governance, compliance, and scale needs |
Editing features and workflow fit: templates, timelines, color tools, audio, and export options
Start with a candidates set that prioritizes templates, robust timelines, color tools, and flexible export options; this focus limits constraints early and accelerates adoption.
For photographers and teams wanting efficient workflows, target elite candidates with a crisp frontend, clear build processes, and transparent cost structures within your range.
In terms of workflow fit, look for objects and projects that map to common styles: documentary, studio, engagement shots, weddings.
Please collect input from designers and photographers early in the screening.
Templates: assess diversity, customization depth, and how templates map to imagevideo pipelines; ensure you can adapt a hundred objects across different styles.
Timelines: verify multi-track handling, nested timelines, and snap-to features; a system that reduces switching between coding tasks and UI work improves engagement.
Color tools: test LUT import, gamut support, color wheels, and node-based grading versus simple sliders; consistent results across display devices matter.
Audio: ensure noise reduction, equalization, compression, and ducking; track-level meters and perspective audio handling increase production quality.
Export options: audit codecs, container formats, frame rates, and batch rendering; look for presets that support social platforms and offline delivery.
Adoption, training, and support: interview stakeholders such as anastasia and bolt teams; collect their preferences and constraints, including wanting a short ramp-up and accessible training paths.
Cost and licensing: compare perpetual vs subscription, track total cost of ownership over 12–24 months, and verify dependencies in your frontend build; also note the tech stack and integration costs.
Interoperability and assets: ensure you can move properties, metadata, and objects between apps; verify imagevideo assets keep fidelity in export; code-named vervoe and gunio appear in internal briefs.
Decision framework: shortlist 2–3 candidates, run a pilot with 1–2 projects, measure ease of use, time-to-render, and user engagement; document constraints and expected gains.
Offer next steps: once you’ve tested, prepare a go/no-go decision based on adoption rate and output quality, selecting the option that best fits your needs.
Performance and hardware considerations: GPU/CPU acceleration, proxies, RAM, and project size handling
Enable GPU acceleration on supported hardware to unlock real-time playback and faster renders. Pick a GPU with 8–24 GB VRAM, and pair it with a multi-core CPU (12–16 threads) to maximize animation playback and rippling effects. Because neural tasks like upscaling and denoise rely on GPU compute, keep drivers updated and enable CUDA, Metal, or Vulkan depending on your system to reduce bottlenecks.
RAM matters: 16 GB is a baseline for light 1080p work; 32 GB supports 4K with several tracks, while 64 GB or more is ideal for complex composites, color grading, and neural processing. Ensure headroom to avoid swapping and keep caches hot; if you want a lean setup, use a proxy-first workflow from the start to keep the workflow responsive while you add final passes. This setup helps when adding subject matter, lighting adjustments, and async tasks.
Proxies: create lightweight proxies from source material and keep the file in a separate folder; use 0.25x or 0.5x resolution to balance quality and performance. Switch back to full-res for final passes and printing; expect a small latency when replacing proxies with full-res, but gains during editing are worth it for wanting fast feedback. Proxies support different file types and work across distinct styles in a single project, from photo assets to animation sequences.
Storage and caching: place caches on fast NVMe drives and keep the project file and media on separate disks to avoid I/O bottlenecks; a hires sequence with multiple layers, color work, and audio can create distinct asset groups. Split them into distinct folders to simplify management and backups. Async processing helps when trials run or when heavy effects are applied; this reduces blocking while adjusting lighting and balance, and it aligns with an ideal workflow from conception to final delivery. A well-balanced cache strategy lowers the risk of slowdowns during adding new elements, especially on equipment with limited bandwidth.
Workflow and collaboration: establish roles and naming conventions (gunio-style) for proxies and assets to ensure quick replacement or adding assets; use custom presets to standardize across animation styles, photo assets, and subject matter. Apply trials to validate performance across types of content and equipment; acceptance criteria should include stable frame rate, predictable render times, and clean proxy-to-full-res swaps. From a practical standpoint, maintain a cacean baseline for file naming to simplify cross-team handoffs, and keep a wine break handy after long trials to stay focused during balance adjustments.


